设置
Cloud Run 处于 Alpha 状态,且尚未积极开发。
1. 安装 @remotion/cloudrun
🌐 1. Install @remotion/cloudrun
- Remotion CLI
- npm
- bun
- pnpm
- yarn
npx remotion add @remotion/cloudrun
This assumes you are currently using v4.0.431 of Remotion.npm i --save-exact @remotion/cloudrun@4.0.431
Also update
remotion and all `@remotion/*` packages to the same version.Remove all
^ character in front of the version numbers of it as it can lead to a version conflict.This assumes you are currently using v4.0.431 of Remotion.pnpm i @remotion/cloudrun@4.0.431
Also update
remotion and all `@remotion/*` packages to the same version.Remove all
^ character in front of the version numbers of it as it can lead to a version conflict.This assumes you are currently using v4.0.431 of Remotion.bun i @remotion/cloudrun@4.0.431
Also update
remotion and all `@remotion/*` packages to the same version.Remove all
^ character in front of the version numbers of it as it can lead to a version conflict.This assumes you are currently using v4.0.431 of Remotion.yarn --exact add @remotion/cloudrun@4.0.431
Also update
remotion and all `@remotion/*` packages to the same version.Remove all
^ character in front of the version numbers of it as it can lead to a version conflict.2. 创建一个 GCP 项目
🌐 2. Create a GCP project
在 Google Cloud 控制台中导航到 管理资源 页面。
🌐 Navigate to the Manage Resources screen in Google Cloud Console.
- 在页面顶部的“选择组织”下拉列表中,选择你要创建项目的组织资源。如果你是免费试用用户,请跳过此步骤,因为此列表不会出现。
- 点击创建项目。
- 在出现的新建项目窗口中,输入项目名称并根据需要选择一个结算账户。项目名称只能包含字母、数字、单引号、连字符、空格或感叹号,并且长度必须在4到30个字符之间。
- 在“位置”框中输入父组织或文件夹资源。该资源将成为新项目的层级父项。如果“无组织”是一个选项,你可以选择它,将新项目创建为其自身资源层级的顶层。
- 当你完成输入新项目详情后,点击创建。
3. 在 GCP 项目中启用计费
🌐 3. Enable billing in the GCP Project
为了启用 Cloud Run API,必须在此项目中启用结算。请导航到 Google Cloud 控制台中的 结算 页面。按照屏幕上的提示创建结算账户,然后将新项目链接到此结算账户。
🌐 In order to enable the Cloud Run API, billing must be enabled in this project. Navigate to the Billing screen in Google Cloud Console. Follow the on-screen prompts to create a billing account, and then link the new project to this billing account.
4. 在 GCP 中设置权限 / API / 服务账户
🌐 4. Setup Permissions / APIs / Service Account in GCP
Google Cloud Shell 是一个基于浏览器的命令行接口 (CLI),用于管理托管在 GCP 上的资源和应用。它提供了一台预装了命令行工具和实用程序的虚拟机,包括 Google Cloud SDK 和 Terraform。通过此 Shell,你可以直接在浏览器中访问你的项目、资源和服务。以下步骤将导入一个脚本,以在你的项目中启用必要的 API、资源和权限。
-
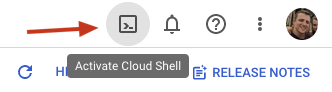
导航到 仪表板,并确保在顶部下拉菜单中选择了你的新项目。然后,在屏幕的右上角,点击激活云 Shell 图标
-
在 Cloud Shell 中,输入以下命令并按照提示操作。
curl -L https://github.com/remotion-dev/remotion/raw/main/packages/cloudrun/src/gcpInstaller/gcpInstaller.tar | tar -x -C . && node install.mjs
- 选择 1来为 Remotion Cloud Run 设置此项目,或重新运行设置以进行更新。
- 选择 2生成一个新的 .env 文件,或管理已创建的密钥,并改为按照这些步骤操作。
-
当提示应用计划时,输入
yes。当提示生成 .env 文件时,输入yes。 -
运行以下命令以查看环境变量。将它们复制到本地的
.env文件中(如果不存在则创建它):cat .env -
从虚拟机中删除 .env 文件:
rm .env
5. 可选:验证权限设置
🌐 5. Optional: Validate the permission setup
在你的代码库中,运行以下命令以验证 GCP 中的权限是否设置正确。只要你的 GCP 项目是使用匹配的 Remotion 版本设置的,这应该会通过。
🌐 From within your code base, run the following command to validate the permissions are setup correctly in GCP. As long as your GCP project was setup with a matching Remotion version, this should pass.
npx remotion cloudrun permissions对于以下步骤,你可以在命令行接口上执行它们,或者使用 Node.JS API 以编程方式执行。
🌐 For the following steps, you may execute them on the CLI, or programmatically using the Node.JS APIs.
6. 部署服务
🌐 6. Deploy a service
- CLI
- Node.JS
通过执行以下命令,在你的 GCP 项目中部署一个可以渲染视频的服务:
🌐 Deploy a service that can render videos into your GCP project by executing the following command:
npx remotion cloudrun services deploy你可以使用 deployService() 在你的 GCP 项目中部署一个可以渲染视频的服务。
🌐 You can deploy a service that can render videos into your GCP project using deployService().
const deployResult = await deployService ({
projectID : 'my-remotion-project',
region : 'us-east1',
});返回的对象包含一个 name 字段,你在渲染时需要使用它。
🌐 The object that is returned contains a name field, which you'll need for rendering.
该服务由必要的二进制文件和 JavaScript 代码组成,可以获取一个 服务 URL 并从中进行渲染。服务与 Remotion 版本绑定,如果你升级了 Remotion,你需要部署一个新的服务。服务不包含你的 Remotion 代码,它将在下一步中部署。
🌐 The service consists of necessary binaries and JavaScript code that can take a serve URL and make renders from it. A service is bound to the Remotion version, if you upgrade Remotion, you need to deploy a new service. A service does not include your Remotion code, it will be deployed in the next step instead.
将打印出一个 Cloud Run URL,提供访问已部署服务并执行渲染的唯一端点。或者,你也可以使用打印出的 Service Name 来访问已部署服务并执行渲染。
🌐 A Cloud Run URL will be printed, providing unique endpoint for accessing the deployed service and performing a render. Alternatively you can use the Service Name, that is also printed, for accessing the deployed service and performing a render.
7. 部署一个网站
🌐 7. Deploy a site
- CLI
- Node.JS
运行以下命令将你的 Remotion 项目部署到云存储桶。将项目的入口点作为最后一个参数传入。
🌐 Run the following command to deploy your Remotion project to a Cloud Storage bucket. Pass as the last argument the entry point of the project.
npx remotion cloudrun sites create src/index.ts --site-name=my-video将打印一个 serveUrl,指向已部署的项目。
🌐 A serveUrl will be printed pointing to the deployed project.
当你将来更新你的 Remotion 代码时,请重新部署你的网站。传递相同的 --site-name 以覆盖之前的部署。如果你不传递 --site-name,每次部署都会生成一个唯一的 URL。
🌐 When you update your Remotion code in the future, redeploy your site. Pass the same --site-name to overwrite the previous deploy. If you don't pass --site-name, a unique URL will be generated on every deploy.
首先,你需要在首选区域创建一个云存储桶。如果已经存在,将改用现有的存储桶:
🌐 First, you need to create a Cloud Storage bucket in your preferred region. If one already exists, it will be used instead:
import path from 'path';
import {deploySite , getOrCreateBucket } from '@remotion/cloudrun';
const {bucketName } = await getOrCreateBucket ({
region : 'us-east1',
});接下来,将你的 Remotion 项目上传到云存储桶。指定你的 Remotion 项目的入口点,这是调用 registerRoot() 的文件。
🌐 Next, upload your Remotion project to a Cloud Storage bucket. Specify the entry point of your Remotion project, this is the file where registerRoot() is called.
const {serveUrl } = await deploySite ({
bucketName ,
entryPoint : path .resolve (process .cwd (), 'src/index.ts'),
siteName : 'my-video',
});当你将来更新你的 Remotion 代码时,请重新部署你的网站。传入相同的 siteName 以覆盖之前的部署。如果你不传入 siteName,每次部署都会生成一个唯一的 URL。
🌐 When you update your Remotion code in the future, redeploy your site. Pass the same siteName to overwrite the previous deploy. If you don't pass siteName, a unique URL will be generated on every deploy.
8. 渲染视频或静态图片
🌐 8. Render a video or still
- CLI
- Node.JS
- Render Media
- Render Still
<serve-url | site-name>在第7步网站部署期间返回了服务 URL。如果使用来自云存储桶的服务 URL,你可以改为传递网站名称。<composition-id>传入你想要渲染的 作品 ID。
- Render using Cloud Run Url
- Render using Service Name
<cloud-run-url>云运行 URL 在第 6 步服务部署期间返回。
npx remotion cloudrun render <serve-url | site-name> <composition-id> --cloud-run-url=<cloud-run-url><service-name>服务名称在第6步服务部署期间被返回。<region>服务所在的区域,在步骤6服务部署期间返回。仅在使用服务名称时才需要。
npx remotion cloudrun render <serve-url | site-name> <composition-id> --service-name=<service-name> --region=<region>在视频渲染完成之前,将会打印进度。恭喜!你已使用 Remotion Cloudrun 渲染了你的第一个视频 🚀
🌐 Progress will be printed until the video finished rendering. Congrats! You rendered your first video using Remotion Cloudrun 🚀
<serve-url | site-name>在第7步网站部署期间返回了服务 URL。如果使用来自云存储桶的服务 URL,你可以改为传递网站名称。<still-id>在你想要渲染的静态图片ID中通过。
- Render using Cloud Run Url
- Render using Service Name
<cloud-run-url>云运行 URL 在第 6 步服务部署期间返回。
npx remotion cloudrun still <serve-url | site-name> <still-id> --cloud-run-url=<cloud-run-url><service-name>服务名称在第6步服务部署期间被返回。<region>服务所在的区域,在步骤6服务部署期间返回。仅在使用服务名称时才需要。
npx remotion cloudrun still <serve-url | site-name> <still-id> --service-name=<service-name> --region=<region>恭喜!你使用 Remotion Cloudrun 渲染了你的第一帧 🚀
🌐 Congrats! You rendered your first still using Remotion Cloudrun 🚀
- Render Media
- Render Still
你已经在之前的步骤中获得了服务名称。但由于你只需要部署一次服务,所以在渲染视频之前以编程方式检索已部署服务的名称是很有用的,以防你的 Node.JS 程序重新启动。我们可以使用 compatibleOnly 标志调用 getServices() 来仅获取与特定版本匹配的服务。
🌐 You already have the service name from a previous step. But since you only need to deploy a service once, it's useful to retrieve the name of your deployed service programmatically before rendering a video in case your Node.JS program restarts. We can call getServices() with the compatibleOnly flag to get only services with a matching version.
import {getServices , renderMediaOnCloudrun } from '@remotion/cloudrun/client';
const services = await getServices ({
region : 'us-east1',
compatibleOnly : true,
});
const serviceName = services [0].serviceName ;我们现在可以使用 renderMediaOnCloudrun() 函数触发视频渲染。
🌐 We can now trigger a render of a video using the renderMediaOnCloudrun() function.
const result = await renderMediaOnCloudrun ({
serviceName ,
region : 'us-east1',
serveUrl : url ,
composition : 'HelloWorld',
inputProps : {},
codec : 'h264',
updateRenderProgress ,
});
if (result .type === 'success') {
console .log (result .bucketName );
console .log (result .renderId );
}从 @remotion/cloudrun/client 导入,而不是导入整个渲染器,因为整个渲染器无法打包。
渲染现在将开始,过一会儿视频将可在你的云存储桶中访问。你可以通过向 updateRenderProgress 属性传递一个函数来跟踪渲染进度,以数字形式接收进度。
🌐 The render will now run and after a while the video will be available in your cloud storage bucket. You can keep track of the render progress by passing a function to the updateRenderProgress attribute, to receive progress as a number.
恭喜!查看你的云存储桶 - 你刚刚使用 Remotion Cloud Run 渲染了你的第一个视频 🚀
🌐 Congrats! Check your Cloud Storage Bucket - you just rendered your first video using Remotion Cloud Run 🚀
你已经在之前的步骤中获得了服务名称。但由于你只需要部署一次服务,所以在渲染视频之前以编程方式检索已部署服务的名称是很有用的,以防你的 Node.JS 程序重新启动。我们可以使用 compatibleOnly 标志调用 getServices() 来仅获取与特定版本匹配的服务。
🌐 You already have the service name from a previous step. But since you only need to deploy a service once, it's useful to retrieve the name of your deployed service programmatically before rendering a video in case your Node.JS program restarts. We can call getServices() with the compatibleOnly flag to get only services with a matching version.
import {getServices , renderStillOnCloudrun } from '@remotion/cloudrun';
const services = await getServices ({
region : 'us-east1',
compatibleOnly : true,
});
const serviceName = services [0].serviceName ;我们现在可以使用 renderStillOnCloudrun() 函数触发静态渲染。
🌐 We can now trigger a render of a still using the renderStillOnCloudrun() function.
const result = await renderStillOnCloudrun ({
serviceName ,
region : 'us-east1',
serveUrl : url ,
composition : 'HelloWorld',
inputProps : {},
imageFormat : 'jpeg',
});
if (result .type === 'success') {
console .log (result .bucketName );
console .log (result .renderId );
}从 @remotion/cloudrun/client 导入,而不是导入整个渲染器,因为整个渲染器无法打包。
渲染现在将运行,过一会儿图片将在你的云存储桶中可用。
🌐 The render will now run and after a while the image will be available in your cloud storage bucket.
恭喜!查看你的云存储桶 - 你刚刚使用 Remotion Cloud Run 渲染了你的第一个静态画面 🚀
🌐 Congrats! Check your Cloud Storage Bucket - you just rendered your first still using Remotion Cloud Run 🚀
下一步
🌐 Next steps
- 选择你想要在其中运行 Remotion Cloud Run 的区域。
- 熟悉命令行接口(CLI)和 Node.JS 的 API(在侧边栏列出)。
- 了解如何升级 Remotion Cloud Run。
- 在上线之前,查看生产检查清单。